Normal Theme Update Process
Upgrading your WordPress Theme to the latest version is highly recommended and is very simple. You’ll get latest features and you’ll also be up-to-date with any security patches.
Download the zip file from member area or creativemarket (where you purchase the theme), unpacks the zip file in a temp directory, delete the old version and moves the new version to the wp-content/themes directory.
There is no “Undo” button if there is anything wrong. Any modification (or customization) to the templates file are lost as well. But settings and theme options are stored in the database. Normally they are not changed during a theme update. If you have a copy of old version, you can restore the old version easily using FTP.
Update a WordPress Theme with the plugin Easy Theme and Plugin Upgrades
Step 1 – Install the Plugin
Go to Plugins > Add new
Search the plugin “Easy Theme and Plugin Upgrades” and click on Install Now.
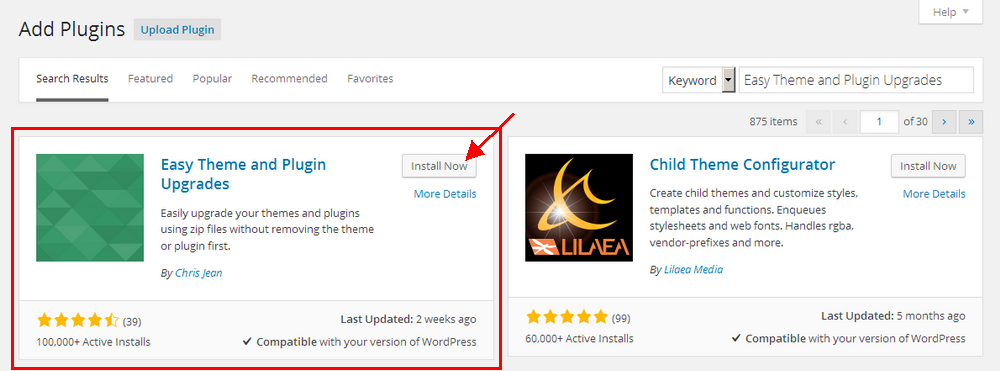
At the end you can click on Activate.
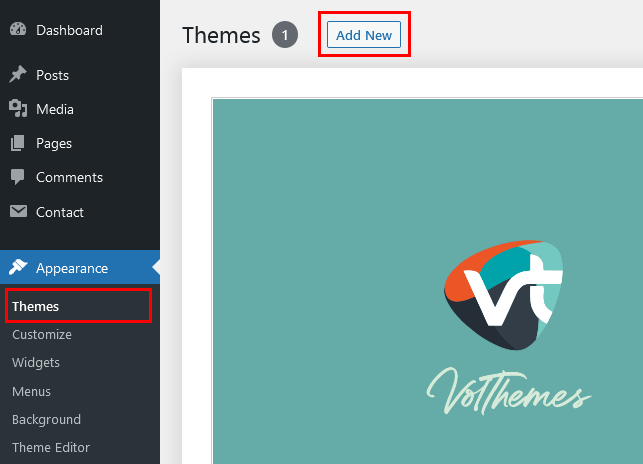
Step 2 – Upgrade your WordPress Theme
Go to Appearance > Themes > Add new > Upload Theme
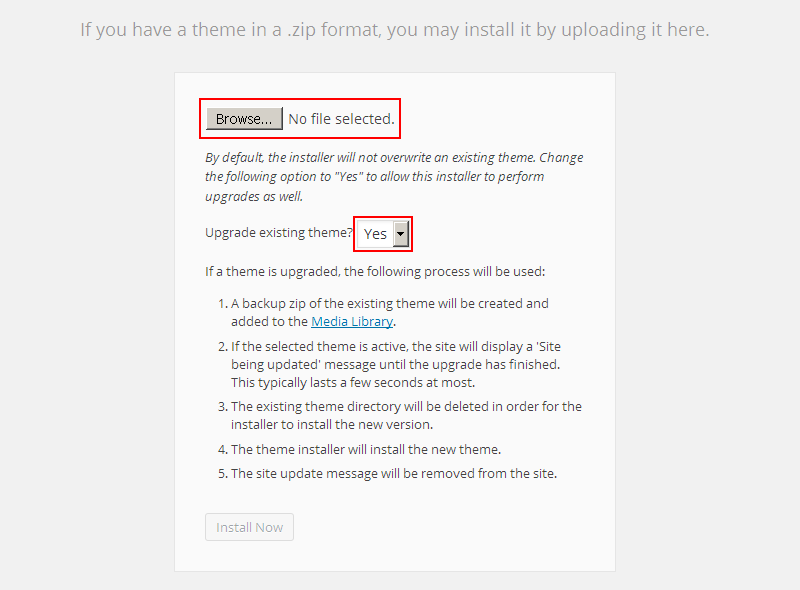
Now you have to choose Yes from the select Upgrade existing theme?
Click on Install Now, then on Activate.
That’s it! Now, you can deactivate “Easy Theme and Plugin Upgrades” plugin.
Change Log
Check out a theme change log text file as part of the main theme package that you have downloaded from member area or creativemarket (where you purchase the theme). That change log text file contains a list of files added, modified and removed in each version of the theme. So, you can use that list of files as a reference and manually replace those files into your existing theme.
If you need to merge an existing file with a new file, for example main css file of the theme then you can use a tool like http://www.diffchecker.com/ to check the difference and a tool like http://winmerge.org/ to merge both files.
Using Child Theme for Future
Every theme comes with a child theme included as part of the main theme package and we recommend to use that child theme and make all future changes in that child theme. This way you can easily update parent theme whenever the new updates becomes available. As, We always try to keep our themes up to date and we also keep adding more and more features over the time.
—
To update WordPress theme automatically, please refer to this article.
 5. At select input type, select the theme file from your computer.
example:
5. At select input type, select the theme file from your computer.
example: